THE NAPPY PROJECT
  • Home
  • How to
    • Choose a nappy style
    • Get started
    • Get the right fit
    • Clean and maintain
    • Troubleshoot issues
  • Resources
    • Glossary
    • FAQs
    • Useful links
    • Pre-loved nappies
  • Workshops
    • Ongoing support
  • About
    • Nappy packs
    • Contact

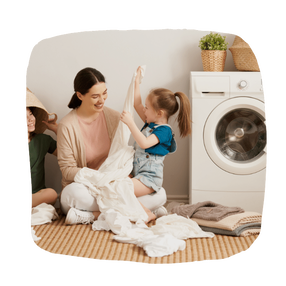
Clean and maintain reusable nappies

Picture
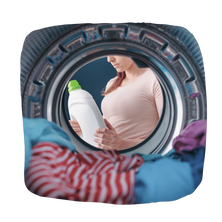
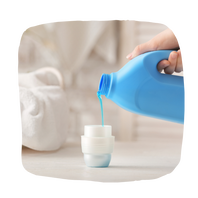
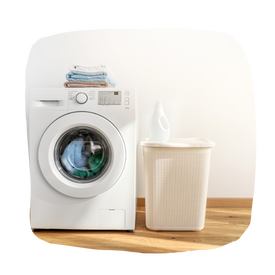
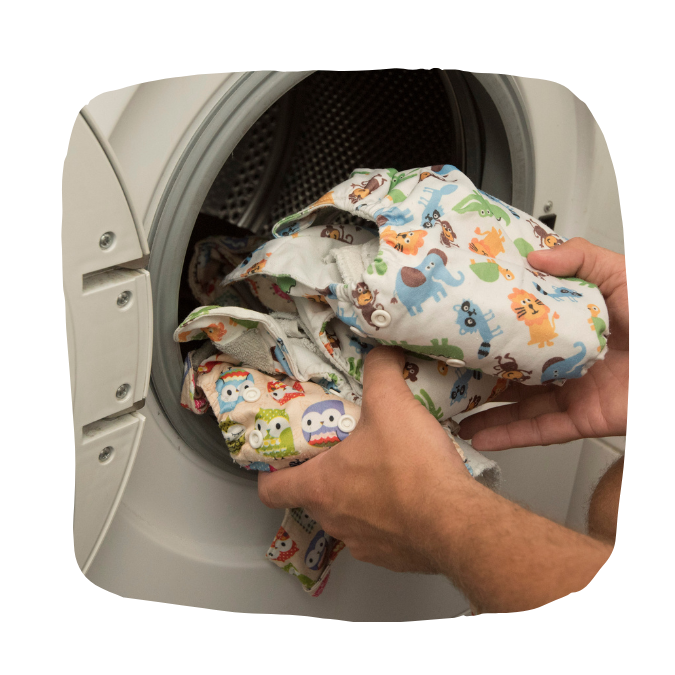
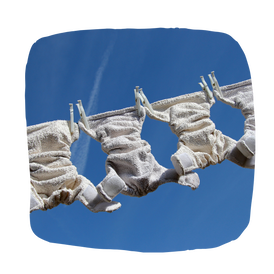
A good wash routine is the key to cloth nappy success. 

The key washing steps are:
  • Remove and rinse soiling
  • Prewash 
  • Main wash 
  • Dry

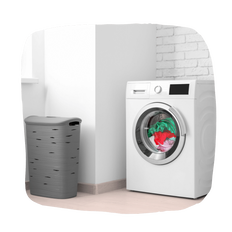
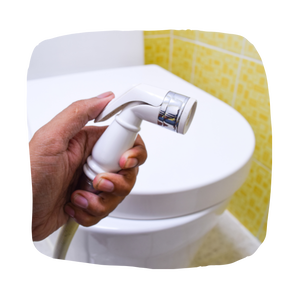
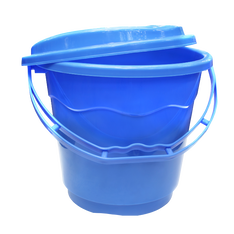
Before we get into the wash routine, let's make sure your setup works for you. 

Your setup

There are lots of 'nice to have' items that can make your washing activities easier. These first three items are the things you will need regardless. 
Picture
​A vented bucket (known as a dry pail) to store your soiled nappies before washing. A pedal bin works just as well, and keeps your hands free. A vented bucket (with air flow) will reduce ammonia buildup. 
Picture
Access to a washing machine, laundromat or a commercial washing service. 
Picture
A quality detergent, and the right amount of it. Don't use too much or too little. Visit Clean Cloth Nappies Detergent page for help choosing a detergent. 

Picture

Dry pail location

You may wish to locate your dry pail beside your nappy change table, in your laundry, or somewhere else convenient. 

Picture

Choosing a detergent

Try to choose a super concentrated detergent. A concentrate is generally free from fillers such as plastics, that can cause buildup on your nappies.

Most mainstream detergents will do the job if used correctly - don't be too heavy handed with detergent unless you want to do additional rinse cycles.

If possible, avoid irritants such as artificial fragrances, which often contain phthalates. Phthalates are a group of chemicals commonly used to make plastics more flexible and are considered harmful due to their potential to disrupt hormonal balance and negatively impact human health.

Detergents with enzymes can achieve same results with a shorter or cooler wash. Visit Clean Cloth Nappies for more information.

Wash routine

Step 1: Remove poo

Picture
Remove as much poo from the nappy as possible. You can do this in a few ways:
  • scrape or wipe it off the nappy and put poo into the toilet
  • shake the poo it into the toilet
  • use a disposable nappy liner and bin the liner
  • use a nappy sprayer. 

A nappy sprayer is a bidet attachment that can be attached to the toilet water inlet, providing an on-demand trigger hose for rinsing solids off the nappy. 

You can buy a bidet or nappy spray attachment at most hardware and plumbing stores, many cloth nappy stores, and major online discount stores. Expect to pay between $30 (Amazon) and $90 (Hardware, plumbing or nappy stores) for a sprayer. 
To save time, spend 10 minutes at the end of each day doing this task, rather than stopping to do it for every nappy. 

Step 2: Store

Picture
Store your soiled nappies in a wetbag or 'dry pail'. A dry pail is a vented bucket or even a laundry hamper. You can use a standard bucket if you need to, and leave the lid off for ventilation. Do not add any water to the bucket - just store the dirty nappies there for up to 48 hours. 

Don't soak the nappies. Frequent soaking compromises the elastic and waterproof layer in the nappy shell. 

​Wring out or machine spin out excess water if possible. This helps prevent ammonia from forming. 

Soiled nappies should spend no more than two days in a dry pail before they are put through a pre-rinse or pre-wash cycle. ​

Step 3: Pre wash

Picture
Just like you flush the toilet before cleaning it, you should rinse out the bulk of the soiling on nappies before washing them. This is called a pre wash or a sluice cycle. 

Ideally, separate the nappy inserts (the absorbent parts) from the nappy shell. ​This will allow for greater soiling removal. The nappy shell may not require a pre-wash of it is not soiled. 

A pre wash is a short cycle with no more than a half dose of detergent to flush out the bulk of the soiling. A prewash should:
  • be done within 2 days of the nappy being soiled
  • can be a cold or warm cycle
  • can be done with a low dose of detergent so that there is not too much residual detergent remaining before the main wash.

On completion, either store the pre washed nappies in a dry pail (optional) or continue straight to the main wash (less effort!). 
Note, it is always best to follow the manufacturer's instructions for water temperature, detergents and wash hints, as this preserves your warranty. 

Step 4: Main wash

Picture
Wash temperatures may vary depending on the brand of nappies you use. Each brand will recommend how to wash nappies. Some brands recommend washing in cold water, others in 40-60 degrees. Most brands will reccomend a long wash (2-3 hours). 

Remember - common sense is key. If you use a poor detergent, too much or too little, or too short a wash, you may not get a thorough wash regardless of temperature. Use common sense to ensure you have a thorough wash that has removed all residual bodily fluids and all residual detergent.

The main wash should be completed within two days of the pre wash. 
Hot versus cold wash
Water temperature can be quite a contentious issue in some nappy groups!

Factors to consider include: electricity use, detergent quality, level of soiling, how long you want your nappies to last, manufacturer instructions and warranty, and personal preference. Washing in cold (20 degree) water has sustainability benefits in energy saving and longevity of nappies. Washing in warm water (40-60 degrees) will reduce wash time and slightly increase effectiveness of detergent, but use more energy and shorten the life of your nappies. Consider your personal situation and don't feel bullied into one way of washing. Remember, even the guidelines keep changing! Do what works for you. 

Here's an interesting article by ABC on the negligible difference between washing in warm or cold water. 

If you choose to wash in cold water, ensure that you are getting a thorough clean by washing for long enough and with the right dose of detergent. You can also add enzymes or other chemical agents to kill germs and bacteria, or do a periodic hot wash of inserts.

​According to the UK's Health and Safety executive, a hot wash includes a minimum of ten consecutive minutes at 60 degrees, or a minimim of three minutes at 71 degrees. 

However as long as all the bodily residue is removed, nappies will generally be sanitary.  Use common sense when washing, and just focus on back to basics. Getting caught up in heavy handed rules can be a barrier to nappy success. 
For the main wash, follow the detergent directions for a heavily soiled load, and set it to a long wash, or alternatively a 'cotton' or heavy soiling wash.  

Get to know your machine and its cycle lengths and temperatures. A cottons or heavy soiled load cycle should be suitable on most machines.

Watch the step by step washing guide at Bubblebubs and follow the Podcast for more support. 
Washing instructions for:
  • Barelove care instructions
  • Econaps washing instructions
  • Kidsaroo use and care instructions
  • Bubblebubs use and care instructions
  • My Little Gumnut how to guide

Step 5: Dry your nappies

Picture

​Keep nappy shells separate from inserts for faster drying. 

To protect the waterproof PUL layer and elastic, dry the shells inside on a clothes horse instead of on the washing line. 
Inserts can be dried by:
  • hanging them on the line
  • placing on a clothes horse
  • pegging on a sock hanger, or
  • ​placing in a clothes drier
Picture
Drying inserts in the sun can assist with fading surface stains. Sun drying can also have a better drying ability than a clothes horse or dryer if not used long enough. The less moisture remaining in your fabric, the less ground for mould, bacteria and fungi to breed - residual moisture is not your friend. 
Some sources argue against line drying and ignore the benefts, and line drying certainly won't make up for deficiencies in washing. The positives are that line drying saves electricity, gives you some much needed vitamin D, fades stains (and fabric colour if you are not careful!) and inhibits the ability for bacteria to reproduce. 

"UV rays don’t disinfect by killing bacteria or dust mites on the spot. Instead, it attacks the photochemical reaction the bacteria undergo to be able to replicate." 

​Visit the FAQs page for more information on sunlight and nappies. 
Download: Australian Nappy Association wash card

Sanitising nappies and strip washing

From time to time, your nappies may need more than just a standard wash. Whether your nappy has build-up of smells, stains, or is lacking absorbency, a strip-sanitise wash can help. 

You should also do a sanitise-wash if:
  • you wash in cold water 
  • your baby has had a fungal or yeast infection
  • your baby has nappy rash
  • you have received second-hand nappies, or
  • you are sharing nappies in a setting such as child care or family daycare.  

The two mose effective ways to oxidise ammonia buildup are by using either chlorine bleach or high heat. 

You should always check with the manufacturer of your nappies for guidance on washing and disinfecting nappies so that you don't void the warranty. Manufacturers are happy to help and won't charge you to provide advice. 
Hot wash / sanitise cycle

Many washing machines will have a sanitise cycle. This cycle reaches temperatures of up to 95 degrees. This is much higher than a standard warm-hot wash of around 40-60 degrees. 

If your machine does not have this feature, you can disinfect nappy inserts on the stove by placing in a large pot with water and maintaining 71 degrees (below a simmer) for at least three minutes.

Note: any waterproof layers (such as PUL shells) or woollen covers (which may shrink) should not be placed through a hot wash of this nature). Always check with the nappy manufacturer before sanitising in high temperatures so that you don't void your warranty. 
Bleach-free disinfecting

There are several ways to disinfect fabrics without the use of chlorine bleach. This guide on Fluff Love University offers some options using hydrogen peroxide and borax. 

Other laundry whiteners are also a popular choice and less hazardous to have around the house than chlorine bleach.

The Nappy Project's Building Biologist recommends vinegar for sanitising inserts. Vinegar kills mould spores and other fungi, viruses and bacteria. 
Chlorine bleach wash (last resort)

As a last resort, and only as a last resort, you can reach for bleach. Bleach should not be necessary if you've tried these other methods. 

Safety: Before using bleach, ensure that you have read and understood the safety instructions on the bottle. Avoid breathing in bleach vapour. Never mix other cleaning chemicals with bleach as it is highly reactive and can give off unsafe vapours. Never use bleach in warm or hot water as it gives off hazardous vapours. Bleach is also an environmental toxin and must be handled with care. 

The methods below are of a general nature and you should explore different concentrations and methods (see Step 2: Dilute) of using bleach to avoid damage to your washing machine, nappies, health and waterways. 

Method
​Materials Needed
  • Unscented chlorine bleach (containing sodium hypochlorite) around 5% concentration
  • Water
  • Large bucket or basin
  • Rubber gloves
  • Other safety equipment specified on the bottle
Step 1: Prepare
  • Put on rubber gloves to protect your hands from contact with bleach.
  • Fill a large bucket or basin with water. The amount of water will depend on how many nappies you plan to bleach. Variables include the bleach concentration (written on the bottle as a %), and the probelm you are trying to solve. For example removing mildew requires more bleach than a brightening wash. 
  • Wash inserts/fabric prior to bleaching. Residual organics (such as urine or faeces) can deactivate the active ingredients in bleach. 
Step 2: ​Dilute
Add bleach to cold water in the bucket. The following ratios are a guide only and you should never exceed the concentration listed on the packaging or Material Safety Data Sheet (MSDS).  

Please note that it's always a good practice to use proper measuring tools to ensure accurate measurements, especially when dealing with disinfection solutions.

Dilution rates will vary depending on the concentration of bleach (usually 4 to 5%m/vol) for cold to water in a bucket or tub. Budget brands will have a lower concentration, so be sure to read the label. 

Safety: chlorine bleach is harmful to health. Never mix it with detergents or chemicals other than water, use in  cold water only, and read the label and Material Safety Data Sheet (MSDS) prior to use. Learn more and use the interactive bleach dilution calculator at Victorian Department of Health. 

Warning: Improper use of bleach, including stronger or weaker concentrations than recommended on the label or MSDS can reduce its disinfection effectiveness and can result in injury. Source: Ipswitch MA government website. 

Purpose
General sanitising (e.g. periodic disinfection or treating secondhand nappies). Suitable for inserts and shells
Bleach rate
Nappymojo suggests: Use 2ml of bleach per litre of water (1:250 ratio)
Cloth nappy nerds has an interactive calculator which suggests 4ml of 4% bleach per 1L of water or 3.15ml of 5% bleach to 1L of water. 

Mild to moderate staining or smells
​Cloth nappy nerds interactive calculator suggests 5ml of 5% bleach per 1L of water or 6.2ml of 4% bleach to 1L of water (approx 1:160 ratio). Depending on the level of soiling, you can adjust this concentration as required. You can also use the ​bleach dilution calculator at Victorian Department of Health. 

​Heavy staining, mould or mildew on fabric (inserts)

NB: bleaching may not remove the mildew spots, it will only kill the spores. 
​A 2012 study by the University of Arizona showed that 5 minutes of direct exposure to 2.4% bleach solution results in greater than a 99.9% reduction in mold. ​

Prior to treating mould, run a hot wash of 90 degrees or greater to kill mould spores and remove residual organics. 

Most sources quote 240ml bleach (3.2 to 4.2%/m/vol) for 3.8 litres of water (63ml/Litre) for surface mould treatment. The higher the bleach concentration, the less you will need. 

You can find more dosing information on the following sources:
  • Bleach use on the Ipswitch MA government website
  • Bleach dilution for infection control, Victorian Department of Health, interactive bleach dilution calculator 
  • Cloth nappy nerds interactive calculator
  • Omni Calculator (Chemistry)
  • Clean Cloth Nappies paid membership (approximately $5.50/month) ​​
  • ​Nappymojo NZ
Step 3: Mix
​Gently mix the bleach and water solution using a long spoon or stick. Avoid splashing the solution, as bleach can be harmful to skin and clothing.
Step 4: Soak
Place the nappies in the bleach and water solution, ensuring they are fully submerged. Allow the nappies to soak for 30 minutes. Check the manufacturer's recommendations for suggested soaking times specific to your nappies.
Step 5: Rinse
After soaking, carefully remove the nappies from the bleach solution and rinse them thoroughly with cold water. Rinse several times to ensure all traces of bleach are removed before moving on to the next step. A 1 hour machine wash with no detergent will make light work of it.  
Step 6: Dechlorinate
To ensure all bleach is neutralised, wash the nappies separately in a hot water wash cycle (>60 degrees) using a cloth nappy-friendly detergent. Use the recommended amount of detergent (according to the the instructions on the detergent packaging) and an extra rinse cycle to ensure thorough cleaning.
Step 7: Dry
After washing, hang the nappies to dry in direct sunlight if possible. Sunlight can help reduce odours and further sanitise and fade stains.

Alternatively, nappy inserts can be placed in a clothes drier. 
​Remember that bleaching should be a last resort. Overusing bleach can deteriorate the fabric and affect the longevity of your cloth nappies. Always follow the manufacturer's guidelines and recommendations for your specific cloth nappy brand. If you're unsure or concerned about using bleach, consider alternative methods like sunning, vinegar soaks, or natural stain removers.

Commercial laundry services


​A commercial laundry service is a great option for anyone using pre-fold terry flat nappies, both at home, at child care centres and hospitals. 

Pre-folds are washed and sanitised the same way that towels and sheets are, so they are not damaged by the process. 

It is best to keep waterproof covers or shells seperate so that the are not damaged by the hot wash with the towels. 

There is a Melbourne-based nappy wash service called Botanic Baby. They offer prefolds, covers and servicing. 
Picture
Picture
What about services for Modern Cloth Nappies?

For modern cloth nappies, you can send your inserts away for a commercial wash. It is best to keep your shells at home and wash them in a domestic machine following the Clean Cloth Nappies guidelines or similar. 

Questions you should ask a commercial laundry include:
  • What detergent and dose do you use?
  • What temperature do you wash in?
  • What is the cycle length?
  • How do you identify my items so that they are returned to me?​
Picture
Sustainability Victoria logo
This project is supported by the Circular Economy Councils Fund. The Fund is delivered by Sustainability Victoria under the Victorian Government’s circular economy policy, Recycling Victoria: a new economy. 
Bayside City Council logo
Monash logo
Boroondara logo
Moonee Valley logo
Brimbank logo
Nillumbik logo
Glen Eira logo
Stonnington
Knox logo
Yarrah City logo
Maribyrnong logo
Yarra Ranges logo
Maroondah logo
Whitehorse Council logo
(c) 2023
  • Home
  • How to
    • Choose a nappy style
    • Get started
    • Get the right fit
    • Clean and maintain
    • Troubleshoot issues
  • Resources
    • Glossary
    • FAQs
    • Useful links
    • Pre-loved nappies
  • Workshops
    • Ongoing support
  • About
    • Nappy packs
    • Contact